Showing posts with label accuquilt. Show all posts

Sunday, May 27, 2012

little quilt monday~~~wavy tumbler mini quilt


Little Quilt Monday

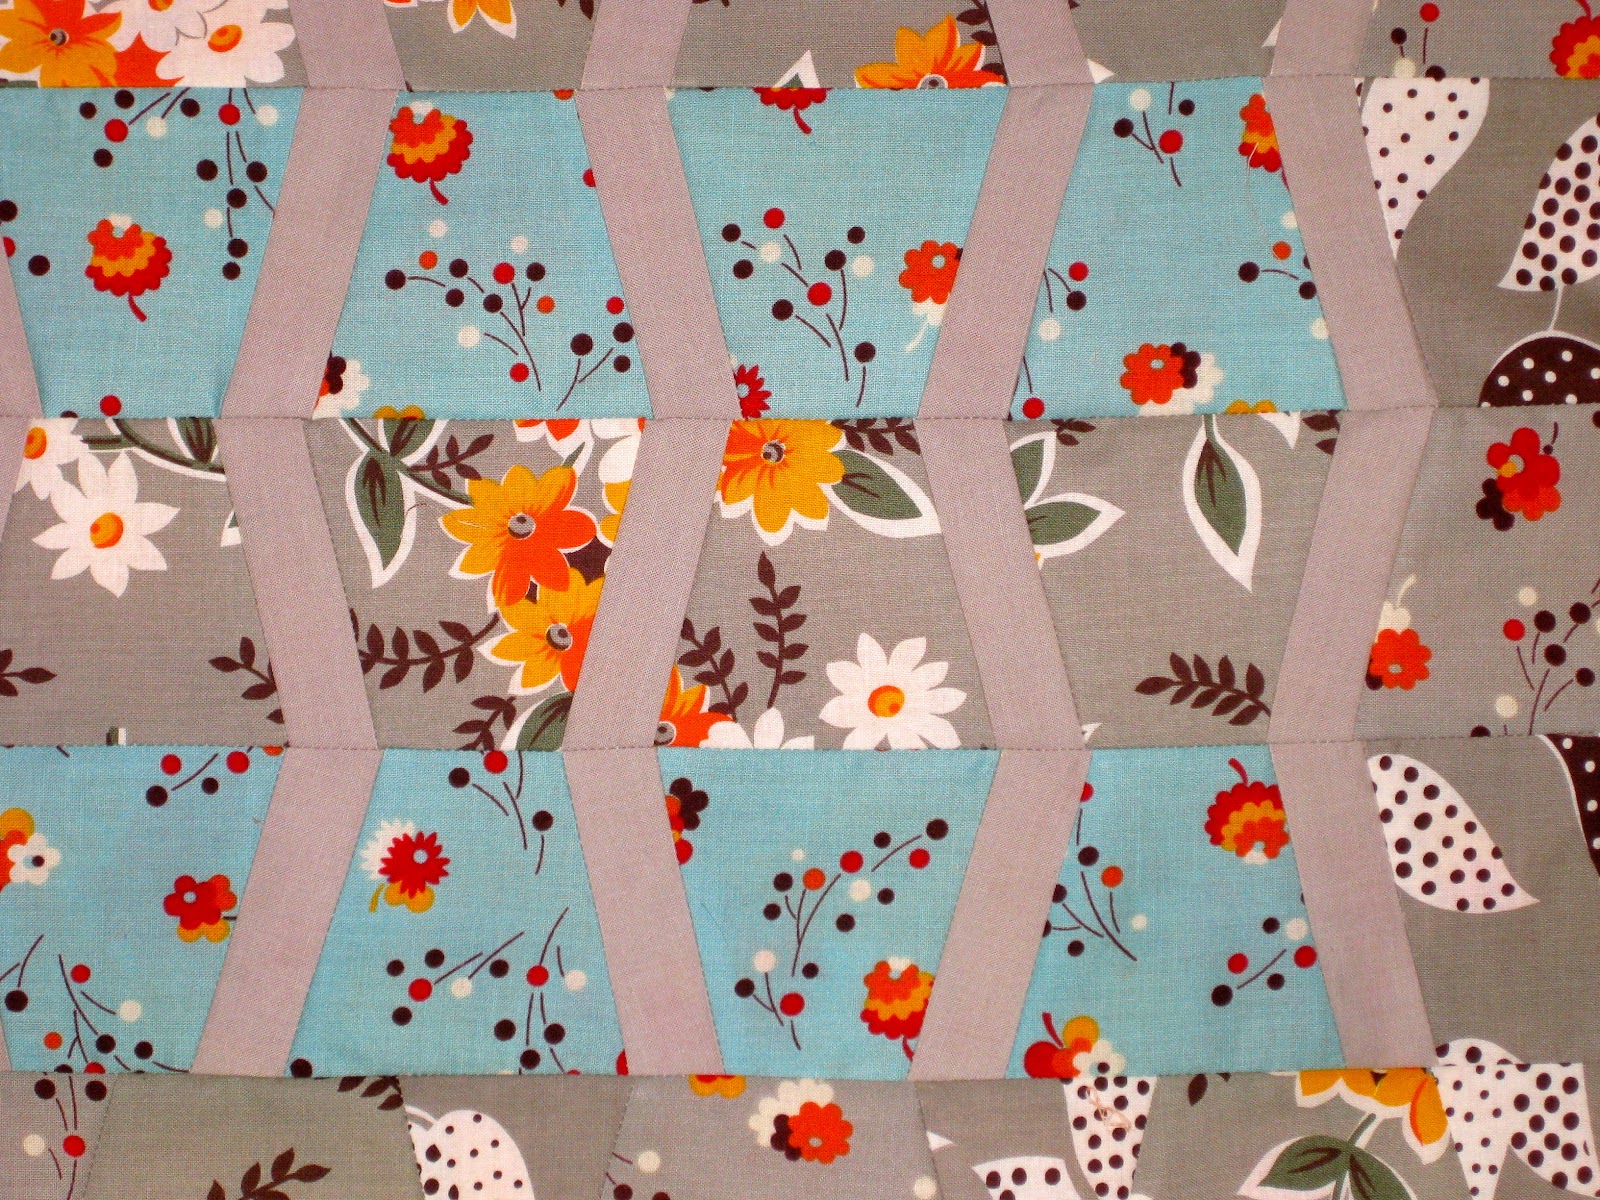
I finished my Wavy Tumbler mini quilt.  It was a fun one to piece together. 
I am planning to make a larger New Wave Quilt that I mentioned here.


 I was able to keep these waves straight with the help of the notches on the
 Accuquilt Go!Baby tumbler die.  Now I need to figure out where to notch the pieces


I used a bright gold crochet thread to hand stitch this mini quilt.


The fabric is from my Flea Market Fancy stash by Denyse Schmidt for Free Spirit.
Click the pictures for a closer look : )


The Wavy Tumbler mini quilt measurements are 17 X 14.5 inches.

Now it is your turn to link up something to

Little Quilt Monday


1.  This link-up party is for any small project.  For example, mini quilts, doll quilts, baby quilts, place mats, mug rugs,
wall quilts, table runners, etc.

2.  They can be a WIP(work-in-progress) or finished.

3.  If it is something from the past there is no need to write a new blog post, just link the one that you have already written, and, please link back to my blog post.

4.   If you are interested, you can add your pictures to my flickr group here, or join my Facebook group here. 

Let's inspire each other!

piece,
elizabeth

I am linking up to Fabric Tuesday and Quilting by the River.


Thursday, May 24, 2012

show off friday~~~ new wave


Show Off Friday

I am going to make a New Wave Quilt, using Elizabeth Hartman's pattern.


 I have chosen fabric from my stash, of course : )


I am having a hard time keeping the waves straight, so I decided to make a
 mini quilt to figure out how to keep the waves in line.  And, you know I do like to make mini quilts!

I have an Accuquilt Go!Baby, so I cut some tumbler blocks that mimic the waves and 
this is what I came up with:


These small tumbler blocks are easier to keep straight because the edges are trimmed.   This helps you sew them together without any problems.  Now I need to figure out a way to trim the edges of the larger pieces for the wave quilt, so I can easily sew the edges in a straight line.


Any suggestions would be appreciated.


Now it is your turn to link up something~~~~ what do you have for

Show Off Friday

There are no rules for this link up party....this is just the place to show off projects you are working on!


piece,
elizabeth

Tuesday, January 24, 2012

pinwheel mini quilt process post


I took some pictures while I was making the mini pinwheel quilt, using the Lil' Twister tool.   I began with twenty-four  5 inch squares that I cut using my Go!Baby fabric cutter by Accuquilt.  I sewed them together, using a 1/4 inch seam allowance in a 4 X 6 pattern.


I added a 3 inch border.  When I add a border I measure from the middle instead of the edge.  In a small quilt it doesn't make too much difference, but the larger the quilt, the more likely that the edges will be a little bit larger.  By measuring in the middle, you can keep your quilt top square.  I pin the border at each end and then find the center, and pin again.  Then if you have to, you can ease the two pieces as you sew to make them flat.  I know this may sound weird, but it works : )


Next I cut my pinwheels using the Lil' Twister tool.


I started at the top left and cut them in rows.  It is important to keep the pieces in order.  I found it is easier to cut the squares if you put your cutting mat on a table that you can walk around as you cut.  Once you begin cutting you can't really pick up the fabric or move it around.  


I'm not sure what I will do with the scraps, but I kept them and I may use them with the back of my mini quilt.  Next, I turned each square to make a pinwheel and I am ready to sew each row together.


Now they are sewn together and ready for some hand stitching!


I am glad that I finally used this fun tool, it makes the pinwheels easy and uniform.
I am linking up to Tutorial Tuesday at a darling blog called Lawson and Lotti.  

piece,
elizabeth

Tuesday, November 29, 2011

merry little bunting


I made my first bunting to decorate our outdoor fireplace mantle for Christmas.  I have always wanted to make a bunting after seeing so many cute ones on other blogs.

I used my Go!Baby to quickly cut out the triangles and then I sewed them to some red cotton bias tape.  This was so easy : )  I am really enjoying my new dies for the Go!Baby.


I am just beginning to decorate for Christmas.  It is so much fun to bring out the different decorations that I have collected over the years.  The Santa plate on the mantle was painted by my mom and always brings me joy when I see it and think of her.   


Well, it's a lovely day to be decorating, so I better get with it~~~

piece,
elizabeth


Wednesday, October 12, 2011

wip with my go! baby


I finally broke down and purchased a Go! Baby while visiting Colorado last week.  There is a fun, crafty store called Fringe in Salida, Colorado.  They sell a wonderful selection of fabrics, yarns, and gifts.  They also have a nice class schedule each month.  I always try to visit Fringe when I am in Colorado, and this time they were having a sale : )  I came home with a Go! Baby and the tumbler and 2.5 inch strip dies.  I am now deciding what new dies I need to add to my collection!

My fabric stash in Colorado is limited but this is what I came up with while I was there using the tumbler die:


I really like the wavy colorful design of this little mini quilt and I will probably end up hand stitching with more color.
Do you have any suggestions for me?


I pieced a circle with some of the leftover tumbler blocks so I need to decide what to do with it too : )
What an easy way to make a color wheel.


I wonder what die I should get next?

You didn't think we would go to Colorado without Tiger, did you?  He hates the long drive in the car, but he loves the destination!


piece,
elizabeth

Don't forget to add your mini/little quilts to Little Quilt Monday each week : )